
Reviewed · PHOTOGRAPHY SESSIONS
Kyoto Photography Masterclass – Private Photography Lesson
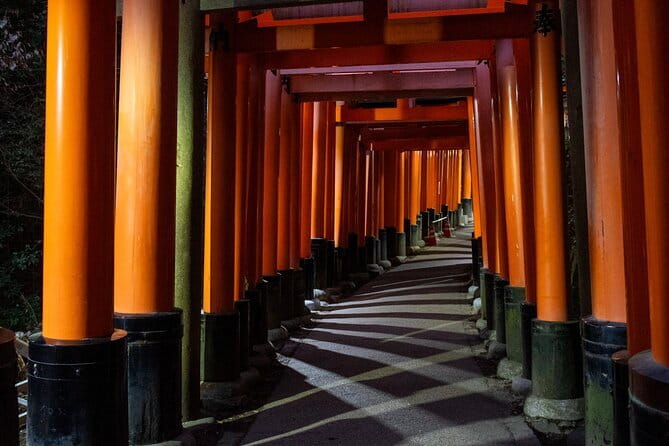
Kyoto at night teaches your camera fast. This private masterclass pairs a professional photographer with local know-how so you can focus on the right angles and camera settings as the city shifts from day texture to lantern glow. You get a true hands-on lesson, plus time to work, review, and try again.
I especially like the street-to-night practice and the way the instructor helps you refine your shots. One session example highlights Irven bringing a tripod, staying patient, and looping through shooting, reviewing, and resetting for better results.
A possible drawback: the tour price is $170 per person for about 3 hours, so it is best if you want coaching (not just sightseeing). You also need your own camera since it is not included, and a tripod is only available if you request one.
In This Review
- Key takeaways for a Kyoto photo masterclass
- Why a street-to-night photo lesson beats solo wandering
- What you actually get: guides, teaching, and practical camera instruction
- Price and value: is $170 per person worth it?
- Starting point in Higashiyama: set your bearings before you shoot
- Gion, Gion Corner, and Minamiza Theater: wooden lanes and performance lighting
- Pontocho District: lantern alley reflections and night exposure practice
- Yasaka Shrine and Hokan-ji Temple: framing sacred spaces without losing your settings
- Koju Ninenzaka and the Kiyomizudera Temple glow: storytelling through patterns and patience
- How the 3-hour lesson flows (and how you should match your pace)
- What to bring, and what to request for night shooting
- Who this Kyoto photo masterclass is best for
- Should you book this Kyoto Photography Masterclass?
- FAQ
- How long is the Kyoto Photography Masterclass?
- Is this tour private?
- What’s included in the price?
- Do I need to bring my camera?
- Is a tripod available?
- Where do we meet, and where does it end?
- What locations are included in the route?
- What is the cancellation policy?
Key takeaways for a Kyoto photo masterclass
- Private, 3-hour coaching aimed at your skill level, not a one-size route
- Street scenes plus night long-exposure practice for lantern light and temple glow
- Tripod support upon request for sharper night frames
- Shot review and reset so you learn by doing, then improving
- Iconic locations in Higashiyama including Gion, Pontocho, Yasaka Shrine, and Kiyomizudera
Why a street-to-night photo lesson beats solo wandering
Kyoto is gorgeous, but your camera can feel like it is on its own mission. What makes this masterclass smart is that it tackles both halves of the day that photographers struggle with: the bright, detailed streets, and the darker, higher-contrast night scenes.
In the street phase, you focus on textures, patterns, and composition. Think wooden machiya facades, shrine atmosphere, and the way narrow lanes force your framing choices. In the night phase, you shift toward telling a quieter story, using long exposure methods so lanterns, temple lighting, and reflections look intentional instead of messy.
The private format matters. You do not have to rush to keep up, and you can slow down when a corner, shadow, or wall texture begs for one more frame.
What you actually get: guides, teaching, and practical camera instruction
This experience is not just a route. It is a teaching session built around two roles: a professional photographer guide and a local English-speaking licensed in-person guide. That combination is a big deal in Kyoto.
The local guide helps you read the city like a local, including where to stand for better sightlines and how to move through areas without losing your light or your angle. The photographer guide then translates what you see into photo decisions: camera settings, composition, and the why behind each shot.
One example of how the coaching works: Irven is specifically praised for being patient and for using a process of reviewing shots during class and then resetting to improve. That is the kind of loop that turns a good outing into real skill growth.
Take the photo everyone else missed
- Kyoto: Maiko Makeover and Photoshoot Experience
★ 4.7 · 239 reviews - Kyoto: Private Photoshoot Service
★ 5.0 · 158 reviews - Your Private Vacation Photography Session In Kyoto
★ 5.0 · 110 reviews - Kyoto: Tea Ceremony with Kimono and Photoshoot
★ 4.9 · 90 reviews
Price and value: is $170 per person worth it?
At $170.00 per person for about 3 hours, you are paying for concentrated instruction, not a general guided walk. That only makes sense if you want to improve.
Here is where the value really comes from:
- Private time with a pro photographer, which is hard to replicate on your own.
- Targeted nighttime help for long exposures, where beginners often waste time getting blurry or overexposed frames.
- Location access to photo-friendly settings around Gion, Pontocho, and the Kiyomizudera area.
- Tripod option upon request, which is a clear night-shooting advantage when conditions call for steadier shots.
If you just want casual photos and you already know what settings to use at night, you might feel the cost. If you want your camera to behave in Kyoto instead of fighting it, this price starts to look fair.
Starting point in Higashiyama: set your bearings before you shoot
You meet at the Statue of Izumo-no-Okuni, Kawabatacho, Higashiyama Ward, Kyoto. Ending back at the meeting point keeps the logistics simple, especially when your brain is busy thinking about framing and light.
Because the meeting area is near public transportation, you can arrive without turning your “photo day” into a transit problem. You also get a mobile ticket, which is handy when you are juggling bags, lenses, and changing weather.
I recommend arriving with a little extra time so you can do quick camera checks before the lesson begins. Night photography punishes small issues, like forgetting a memory card format, a wrong lens mode, or a camera set to the wrong exposure behavior.
Gion, Gion Corner, and Minamiza Theater: wooden lanes and performance lighting
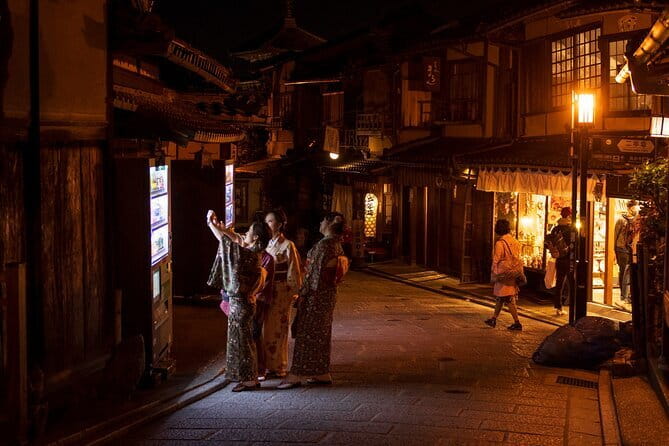
The lesson begins in the Gion area, where Kyoto gives you old-city textures right away. You will be working on how to frame machiya-style buildings and the rhythm of street elements.
At Gion, focus on the basics that matter most:
- Look for leading lines in the street layout.
- Use doorways, signage, and wall edges as natural framing.
- Pay attention to light direction. Even at dusk, shadows can help your compositions.
Next you move toward Gion Corner and Minamiza Theater. These stops are useful for photographers because they offer visual contrast: classic streets with areas that feel tied to performance, culture, and controlled lighting. That contrast is gold when you are learning how to balance brightness between subjects and background.
One practical mindset: in Gion, do not just shoot “the street.” Shoot relationships. A person near a doorway, lantern glow reflecting on a surface, or a theater facade set into the narrow lane tells a more complete Kyoto story than a wide shot alone.
Pontocho District: lantern alley reflections and night exposure practice
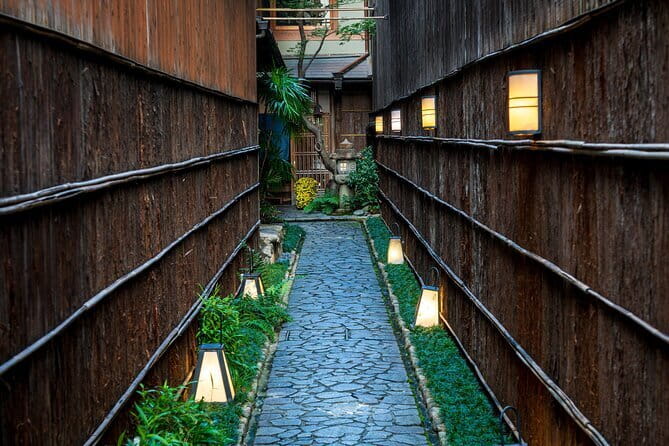
Then comes Pontocho District, one of the most camera-friendly places for learning night technique. This is where lantern light and narrow-lane angles start doing real work for you.
Here is what you are training for during night shooting:
- Long exposure decisions: when to slow the shutter, when to keep it faster, and what changes in your image.
- Stability: night frames get soft when your camera moves even slightly.
- Light balancing: lanterns can overtake the scene if your exposure choices are off.
In at least one night session example, Irven brought a tripod and helped work through night shooting step by step. That tripods matter is not theory. In Kyoto’s night light, a tripod helps you capture calm, sharp lantern detail instead of a blur that looks like an accident.
If you are using a tripod, remember the tradeoff: it makes shooting steadier, but it forces you to slow down and compose deliberately. That is exactly what the lesson is trying to teach you.
A quieter way to spend a day in Kyoto
Yasaka Shrine and Hokan-ji Temple: framing sacred spaces without losing your settings
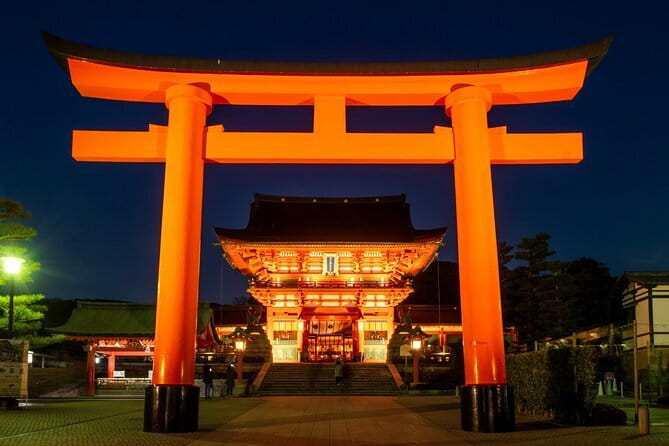
Moving on to Yasaka Shrine, you get a chance to photograph a spiritual space while learning how to keep your camera consistent. Shrines often include mixed lighting and reflective elements, so you will want to avoid changing too many settings at once while you frame.
Key thing to practice here: choose one exposure baseline, then test small framing changes. Instead of chasing the perfect exposure every time, you learn how composition and distance can improve the photo even when lighting stays similar.
At Hokan-ji Temple, you shift again. Temples can reward you for getting lower or shooting through foreground elements so depth becomes part of the story. This is also a good stop for texture lovers, because stone, wood, and aged surfaces make composition feel layered.
If you find yourself getting frustrated, this is where coaching helps. The photographer guide can steer your attention toward the details worth capturing and away from distractions that pull your exposure and focus off track.
Koju Ninenzaka and the Kiyomizudera Temple glow: storytelling through patterns and patience
Next you head to Koju Ninenzaka. This area is great for working with pattern and repetition. Sloped lanes, stone steps, and traditional building lines give you lots of compositional options.
Practically, this is where you practice:
- framing with steps as leading lines
- using repetition to guide the viewer’s eye
- slowing down long enough to capture the moment instead of only the architecture
Finally, you reach Kiyomizudera Temple. At night, this is where the lesson’s goals come together. You want to capture the atmosphere, not just the landmark. That usually means balancing bright temple lights against darker areas around them.
Be ready for the reality of temple-night photography: you will often stand close to bright light sources. If your camera exposure is too aggressive, highlights can blow out. If it is too cautious, the scene can go flat. The coaching focus on night long exposure is meant to help you land in the middle where lanterns, temple glow, and shadows all contribute.
This is also a stop where you may want to pause and try a couple of different framings from the same spot. Small changes, like shifting your angle to include or exclude a bright element, can turn a harsh image into a calm, readable one.
How the 3-hour lesson flows (and how you should match your pace)
The tour is about maximizing your photographic opportunities within a tight time window. The street part helps you learn composition and camera control in easier light. Then the night part forces you to apply those skills to the harder conditions.
Your pace matters. Since it is private, you can ask for a moment to review what you are doing and adjust. That review and reset loop is one of the most praised parts of the overall experience.
If you want your camera to improve fast, here is a simple strategy you can use during the lesson:
- Shoot a short sequence, not single frames.
- Ask what to change before you keep shooting.
- When you review, decide on one specific improvement, then reset and try again.
It is quicker than randomly shooting for the whole night, and it is much easier for the photographer guide to correct your technique.
What to bring, and what to request for night shooting
You need your own camera because it is not included. Bring any lens you already feel comfortable with. If you have a lens you use mostly for streets, that is a good starting point. If you have one that handles low light well, even better.
Also consider whether to request a tripod ahead of time. The tour notes that a tripod is available upon request. For night long exposure, that request can make a noticeable difference.
Finally, wear shoes you can walk in for the 3-hour session. Kyoto is walk-heavy even when the stops feel close. When you are learning photography, small slips like poor footing can ruin focus, stability, and your willingness to try slower shutter times.
Who this Kyoto photo masterclass is best for
This is especially worth it if:
- you want night photography help and long exposure guidance
- you like structure and feedback, not just “go take photos”
- you want a private session so you can work through your own camera questions
- you enjoy classic Kyoto streets and illuminated temple scenes
It might be less satisfying if:
- you already feel confident with night settings and tripod use
- you are looking for only a quick sightseeing loop with no instruction
- you do not have a camera plan, because coaching only helps if you can apply it
Should you book this Kyoto Photography Masterclass?
If your goal is better photos in Kyoto, especially at night, I think this is a strong booking choice. The private format, the blend of a local licensed guide with a pro photographer, and the hands-on rhythm of shooting, reviewing, and improving are the ingredients that turn a cool evening into measurable progress.
Book it when you want coaching you can use immediately, and when you are willing to bring your own camera and ask for tripod support for night shooting.
If you want a relaxing walk with no teaching, or you already know exactly how you’ll shoot lantern light, you may not get enough from the lesson to justify the $170 per person cost.
FAQ
How long is the Kyoto Photography Masterclass?
The session lasts about 3 hours.
Is this tour private?
Yes. It is a private tour/activity, so only your group participates.
What’s included in the price?
You get a local guide, a professional photographer guide, and a licensed English-speaking in-person local guide.
Do I need to bring my camera?
Yes. A camera is not included.
Is a tripod available?
A tripod is available upon request.
Where do we meet, and where does it end?
You start at the Statue of Izumo-no-Okuni in Kawabatacho, Higashiyama Ward, Kyoto, and the activity ends back at the meeting point.
What locations are included in the route?
Stops include Gion, Pontocho District, Gion Corner, Minamiza Theater, Yasaka Shrine, Hokan-ji Temple, Koju Ninenzaka, and Kiyomizudera Temple.
What is the cancellation policy?
You can cancel for a full refund up to 24 hours in advance. Free cancellation is offered, and changes within 24 hours of the start time are not accepted.
New This Season
- Koyasan Day Trip by Private Car from Kyoto
- Old Port Town and Ultimate Sake Tasting Private Tour From Kyoto
- Kyoto’s Timeless Charm: 3hr Exploration of History and Peace
- Kyoto: 5 Types of Sushi Making
- Sacred Peak & Ancient Paths: Kurama-Kibune Hiking Experience
- Kyoto: Exclusive ZEN practice at Manpukuji temple in Uji
- Kyoto: Private Seasonal Aroma Yoga Class
- Traversing Kyoto’s Scenic West – Arashiyama to Kinkakuji
Photography Sessions, compared.
Your Private Vacation Photography Session In Kyoto
Read our review →

Private Photoshoot Experience in Kyoto ( Gion )
Read our review →
Private Photoshoot Experience in Arashiyama Bamboo
Read our review →Also filed under