
Reviewed · ARTISAN CRAFT WORKSHOPS
Roketsu dyeing experience: M course Roketsu Dyeing Experience
A calm workshop in Kyoto where your hands make art. I love the chance to do draw-your-own design work, and I love that you experience the real step-by-step process of bucket dyeing. One thing to consider: English support can be limited, so you’ll rely mostly on hands-on guidance and visual cues.
This is a maker-style break from temples and trains, with a studio feel and a relaxed pace. You’ll work on your item during the session, then you get to take it home the same day, which makes it an easy win for your travel schedule. Group size is capped at 30, so you’re not stuck in a huge class.
In This Review
- Key Roketsu Dyeing Highlights in Kyoto (Roketsu73)
- Roketsu Dyeing in Kyoto: A Hands-On Craft You Can Actually Control
- What You Make: T-Shirts, Tote Bags, and Hanging Art (Choose Your Canvas)
- The Roketsu Method in Plain English: Wax, Resist, and Dye
- Walking In: Meeting Point and First Impressions at Roketsu73
- Step-by-Step: How the 90 to 120 Minute Experience Usually Flows
- 1) Pick your item and plan your design
- 2) Practice and setup so you can work with confidence
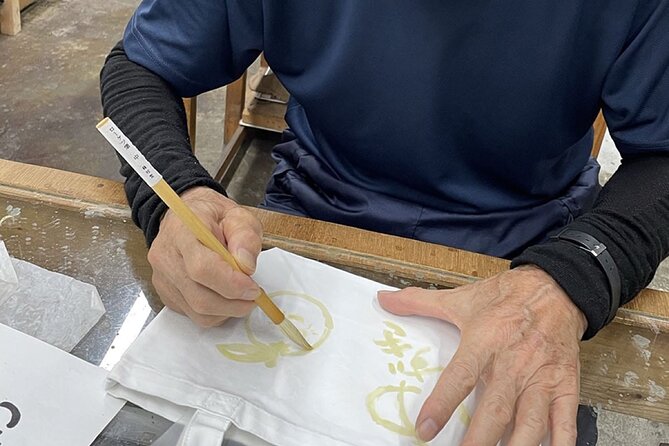
- 3) Paint the melted wax where you want the pattern to appear
- 4) Dyeing happens, and the studio guides the rest
- 5) Reveal and take-home your finished souvenir
- The Instructors: Patient Guidance From the Owner and His Mother, Yoko
- Value for Money: Why $25.77 Feels Like a Real Craft Deal
- Who This Workshop Is Best For (And When to Skip)
- Practical Tips to Get Your Best Roketsu Result
- Should You Book Roketsu Dyeing in Kyoto?
- FAQ
- How long is the Roketsu dyeing workshop?
- Can I take my dyed item home the same day?
- What should I do if I have my own sketch?
- Is there a lot of English support during the workshop?
- What types of items can I dye?
- How big is the group?
- Where is the meeting point?
- What is the cancellation policy?
- Are service animals allowed?
Key Roketsu Dyeing Highlights in Kyoto (Roketsu73)
- Draw and dye yourself, not just watch and copy
- 100% bucket dyeing experience, focused on the core method
- Wax-resist style craft where painting wax shapes the final pattern
- Stencils and freehand options, including making something from your own sketch
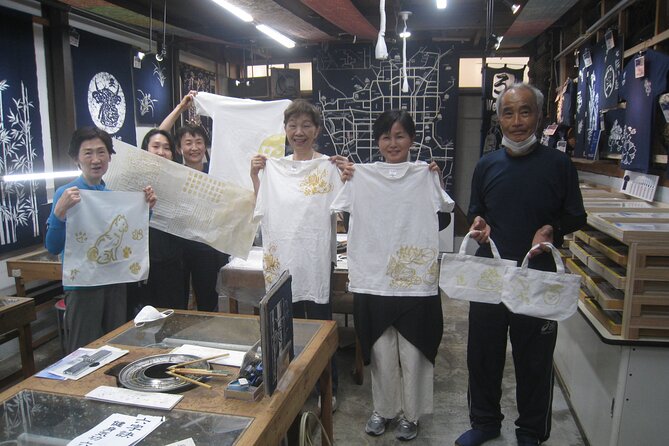
- Take-home souvenir same day after a 90 to 120 minute journey
- Small, family-run vibe, with patient guidance from the studio team
Roketsu Dyeing in Kyoto: A Hands-On Craft You Can Actually Control
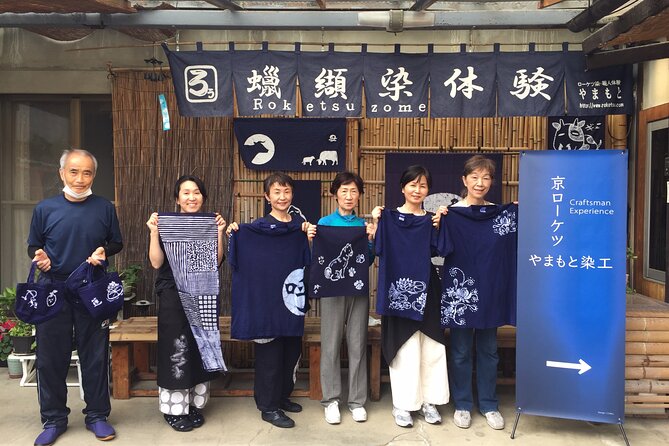
Kyoto can feel like a nonstop parade of sights. This workshop gives you something different, and it does it in a very practical way. You get to sit down, plan a design, then make it happen with your own brushwork and choices, instead of treating it like a quick photo stop.
The main reason this experience feels special is simple: your hands drive the process. You’re not just learning a cultural fact. You’re doing a technique that directly produces a wearable or displayable souvenir. And because it is focused on roketsu and bucket dyeing, you get a clearer sense of how the method creates patterns.
The studio is also described as comfortable and clean, with guidance at each step. Based on what people highlight in their reviews, the instructors tend to be gentle and patient, and they do not rush you if you want to work carefully.
What You Make: T-Shirts, Tote Bags, and Hanging Art (Choose Your Canvas)
One of the best parts is that you get to choose what you’ll dye. People mention items like T-shirts, tote bags, and hanging or banner-style pieces. In other words, you’re not limited to a single boring souvenir shape.
You can go two routes:
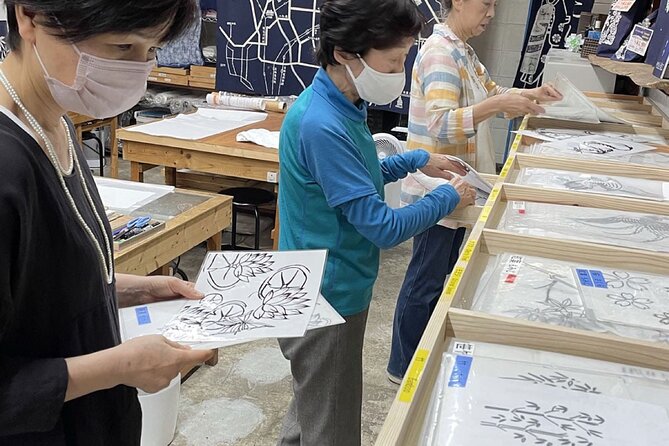
- Pick from many stencil designs, which is great if you want a beautiful result without needing to be an artist.
- Or go freehand. If you have your own sketch, the workshop can help you translate it into a dyeing design.
This mix matters because it fits different confidence levels. Even if you think you’re not “good at art,” the stencil option helps you get started fast. If you are more creative, the freehand approach gives you real authorship.
Make something with a Kyoto craftsman
- Authentic knife making experience at a blacksmith in Kyoto
★ 4.8 · 350 reviews - Kyoto: Calligraphy class at Buddhist temple in city center
★ 5.0 · 167 reviews - Kyoto: Japanese Calligraphy Class
★ 4.8 · 89 reviews - Kyoto: Japanese Calligraphy Workshop
★ 4.7 · 84 reviews
The Roketsu Method in Plain English: Wax, Resist, and Dye
The workshop is described as a “wax resist type of fabric dyeing” experience. Here’s the practical idea, as you’ll see it in your session:
- You prepare the fabric item you chose for dyeing.
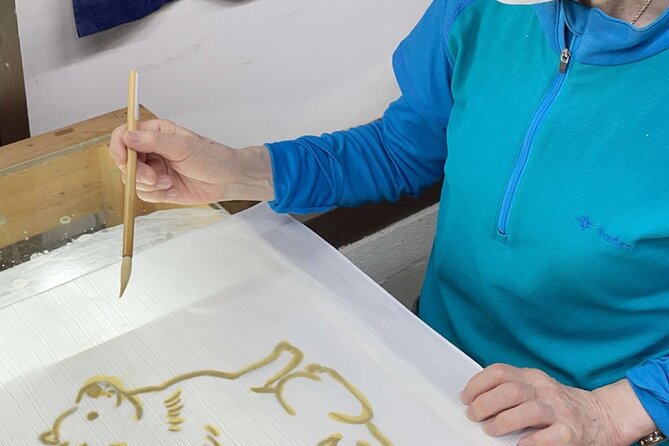
- You apply the wax where you want the pattern to resist the dye.
- After the wax is applied, the piece goes through the dyeing step, often described as bucket dyeing.
The magic is that the wax blocks the dye from reaching those areas. When the wax comes off later, it reveals the pattern created by where you painted the wax. That’s why your brush choices matter, and why each finished piece can look slightly different even if the overall design is similar.
This is also why people call it “100% bucket dyeing.” It’s not just a quick craft that ends at the drawing stage. You get the core technique and the payoff, not an abbreviated demo.
Walking In: Meeting Point and First Impressions at Roketsu73
You’ll start at Roketsu73 Nishikyōgoku Umazukachō, Ukyo Ward, Kyoto, 615-0885, Japan. The location is outside the busiest tourist zone, which is part of the charm. You’re more likely to feel like you’re visiting a working studio than dropping into an attraction.
It’s also described as near public transportation, so you should be able to reach it without turning your day into a logistics puzzle. The studio itself is described as ample and interesting, not cramped, which matters when you’re dealing with wax, dye, and tools.
If you’re worried about language, don’t overthink it. Reviews repeatedly point out that even with limited English, the instruction is hands-on and understandable through demonstration. So you’ll want to pay attention closely at the beginning, when they show you what to do.
Step-by-Step: How the 90 to 120 Minute Experience Usually Flows
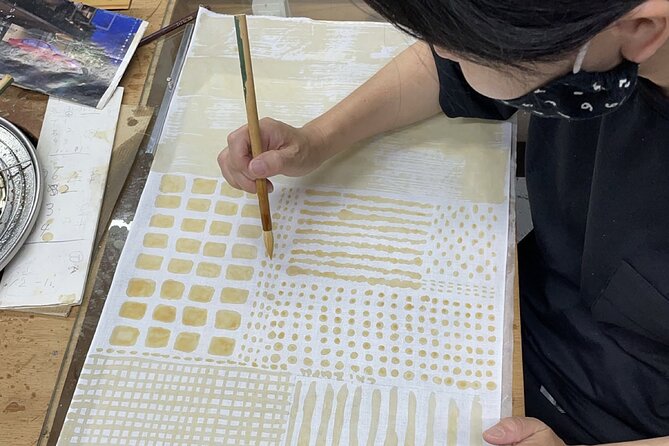
The experience is listed around 90 to 120 minutes, and it is designed so you can take your work home the same day. In real life, the time can stretch if you choose intricate designs or take longer with the drawing stage.
Here’s the flow you should expect, based on the way the workshop is described:
1) Pick your item and plan your design
You’ll start by selecting what you want to dye. Then you’ll pick a design approach:
- Choose from stencil patterns
- Or use your own sketch for an original work
This planning stage is where you can control the outcome. If you want a crisp look, follow a stencil closely. If you want something personal, keep your sketch simple enough for the technique to translate well.
A day of temples goes further with something to break it up.
2) Practice and setup so you can work with confidence
You may do a short practice run on a small piece of cloth. People mention that step specifically, and it’s a big deal. It helps you understand how the wax behaves with your brush, so you don’t panic when it’s time to do the real item.
3) Paint the melted wax where you want the pattern to appear
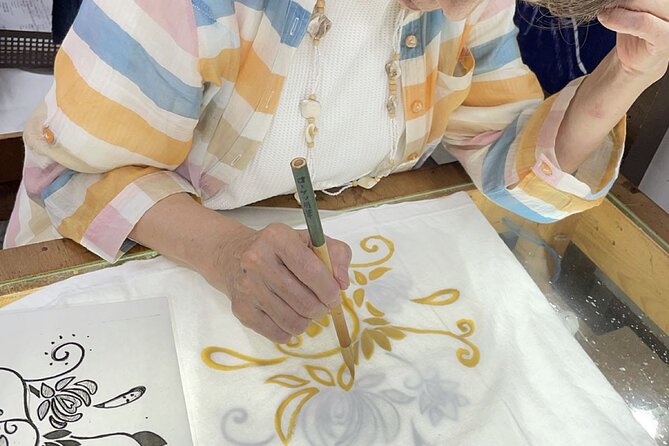
Now the workshop turns into real craft time. You’ll paint with wax onto the fabric. This is where you feel the calm focus people talk about. It’s hands-on, detailed work that slows your day down in a good way.
If you’re worried about not being “artistic,” start by keeping your pattern bold and clear. The wax application is the foundation of the final look.
4) Dyeing happens, and the studio guides the rest
The design you created drives the dyeing result. The studio handles the dyeing step (described as bucket dyeing), and you move from painting to waiting your piece through the dye process.
In some sessions, you might not be doing every single physical step end-to-end, but the workshop is consistently positioned as letting you experience the full core dyeing journey, rather than being reduced to a brief sample painting.
5) Reveal and take-home your finished souvenir
The big payoff is that you take your item home on the day. People really love this. It means you don’t carry around a damp craft for days, and it also means your souvenir is ready while the trip is still fresh.
The Instructors: Patient Guidance From the Owner and His Mother, Yoko
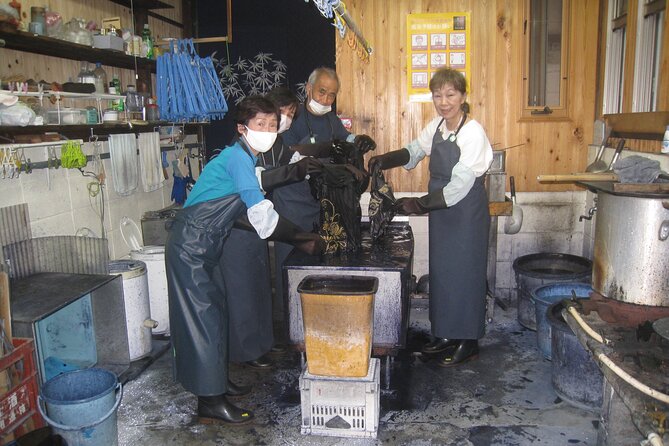
One of the most repeated themes in reviews is how kind and patient the instructors are. People often mention the owner plus his mother, with Yoko specifically named in multiple accounts.
This matters because the process is detail-heavy. Wax resist dyeing looks easy in a video. In real life, it asks for steady hand control and some technique timing. When the instructor is calm and methodical, you get better results with less stress.
Some reviews also mention very limited English. That’s worth flagging, not to scare you off, but so you know what to prepare for. The guidance style seems to work anyway because they show you what to do. Your job is to be present, watch closely, and ask for help if something feels unclear.
If you want the best experience, bring a clear idea of your design. It reduces confusion if language is limited.
Value for Money: Why $25.77 Feels Like a Real Craft Deal
At $25.77 per person, you’re paying for a structured craft session, not just a material fee. The biggest value here is that you end with a one-of-a-kind souvenir that you helped create.
You also get the “made-in-Kyoto” factor. Several reviews describe it as small and family-run, in a studio outside the main tourist areas. That’s often where prices stay reasonable, while the experience stays authentic.
You’re also getting a genuine time-out from sightseeing. Reviews call it relaxing and therapeutic, and that’s not just fluff. Sitting down, drawing, and painting wax creates a rhythm that contrasts with Kyoto walking days.
So yes, you pay a low price for a high emotional payoff. The craft is tangible, wearable or displayable, and it has a story you can explain when you’re home.
Who This Workshop Is Best For (And When to Skip)
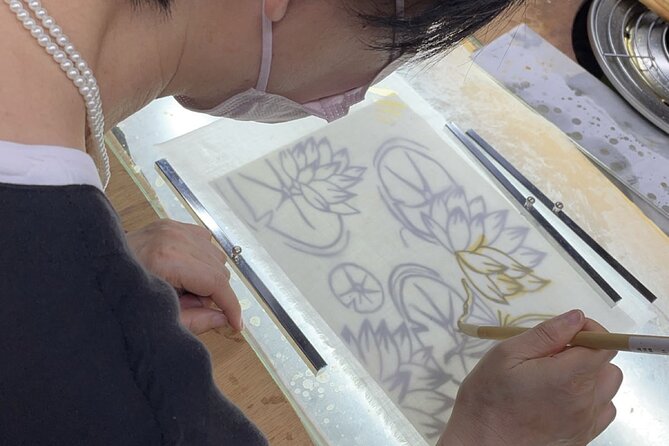
This is a great match if you want a hands-on cultural activity with a clear result. It’s also a strong pick if you’re traveling with kids or teens, since multiple reviews describe family groups having a good time, and the studio team guiding everyone step-by-step.
It’s especially good for:
- People who like crafts, drawing, or DIY souvenirs
- Travelers who need a break from nonstop walking
- Anyone who wants something personal, not mass-produced
You might consider skipping if:
- You hate tasks that require patience and close attention
- You need lots of fluent English interpretation (since communication can be limited)
But if you can follow steps visually, you’re likely to be fine.
Practical Tips to Get Your Best Roketsu Result
Here are the details that help most, based on what works in this kind of wax resist dyeing workshop style:
- Bring a simple sketch idea if you want originality. Clean lines tend to translate better.
- Choose stencil patterns if you want a fast path to a polished outcome.
- Plan to take your time with drawing. Some sessions run longer than the suggested window if you want intricate designs, and people report they never feel rushed.
- Focus on the wax painting stage. That’s where the pattern is born, and it sets your final look.
- Use the practice step if they offer it. It can save you from mistakes on the main item.
Also, you’ll be happier if you treat it as a studio craft, not a performance show. The point is your participation.
Should You Book Roketsu Dyeing in Kyoto?
Book it if you want a real Kyoto souvenir with meaning, and you like the idea of sitting down to make something. The combination of draw-your-own control, a wax resist bucket dyeing process, and take-home same-day results makes it a practical win.
Skip it only if you need high English support or you strongly prefer sightseeing over crafts. Otherwise, this is one of those activities that gives your trip texture, not just pictures.
FAQ
How long is the Roketsu dyeing workshop?
The workshop takes about 90 to 120 minutes.
Can I take my dyed item home the same day?
Yes. The experience says you can take it out on the day in about 90 to 120 minutes.
What should I do if I have my own sketch?
If you have your own sketch, original works can be produced.
Is there a lot of English support during the workshop?
English spoken may be limited. The instruction is described as hands-on, and many participants say they managed fine through guidance and demonstration.
What types of items can I dye?
You can dye items such as T-shirts, tote bags, and banner or hanging-style pieces, based on the workshop description and what participants mention.
How big is the group?
The workshop has a maximum of 30 travelers.
Where is the meeting point?
The start point is Roketsu73 Nishikyōgoku Umazukachō, Ukyo Ward, Kyoto, 615-0885, Japan, and it ends back at the meeting point.
What is the cancellation policy?
Free cancellation is available up to 24 hours in advance for a full refund. The experience can also be canceled due to poor weather, with an offer of a different date or a full refund.
Are service animals allowed?
Yes, service animals are allowed.
New This Season
- Koyasan Day Trip by Private Car from Kyoto
- Old Port Town and Ultimate Sake Tasting Private Tour From Kyoto
- Kyoto: 5 Types of Sushi Making
- Sacred Peak & Ancient Paths: Kurama-Kibune Hiking Experience
- Kyoto’s Timeless Charm: 3hr Exploration of History and Peace
- Kyoto: Exclusive ZEN practice at Manpukuji temple in Uji
- Kyoto: Private Seasonal Aroma Yoga Class
- Traversing Kyoto’s Scenic West – Arashiyama to Kinkakuji
Artisan Craft Workshops, compared.
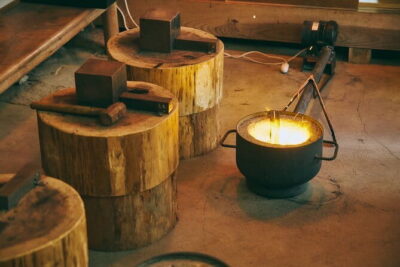
Authentic knife making experience at a blacksmith in Kyoto
Read our review →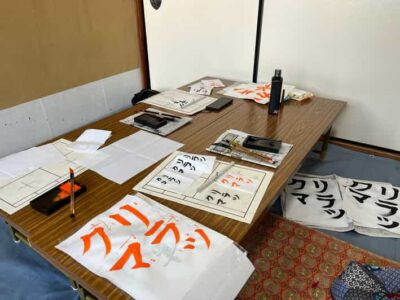
Calligraphy class at Buddhist temple in city center
Read our review →

Traditional Japanese Washi Papermaking- Kyoto morning
Read our review →
Also filed under